

Hyperlight Nanvix: POSIX support for Hyperlight Micro-VMs
The Cloud Native Computing Foundation’s (CNCF) Hyperlight project delivers faster, more secure, and smaller workload execution to the cloud-native ecosystem.

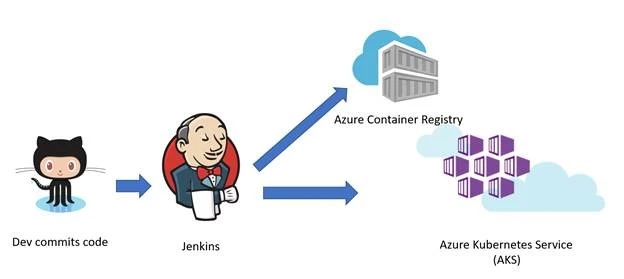
In this blogpost, we will show you how to provision a Jenkins virtual machine and setup a CI/CD pipeline to build an ASP.NET Core application stored in GitHub and deploy the application into Azure Kubernetes Service (AKS).
We start from the solution template in Azure Marketplace since that’s the fastest and easiest path to get Jenkins up and running in Azure. You can follow the steps using your existing Jenkins server, regardless of whether it’s run on premises or in the cloud. The deployment target is Azure Kubernetes Service. It manages your hosted Kubernetes environment, making it quick and easy to deploy and manage containerized applications without container orchestration expertise. It also eliminates the burden of ongoing operations and maintenance by provisioning, upgrading, and scaling resources on demand, without taking your applications offline.
This is the flow implemented in this post:
In the Azure portal, select Create a resource and search for Jenkins. Select the Jenkins offering with a publisher of Microsoft and select Create.
Enter the following information on the basics form and click OK when done.

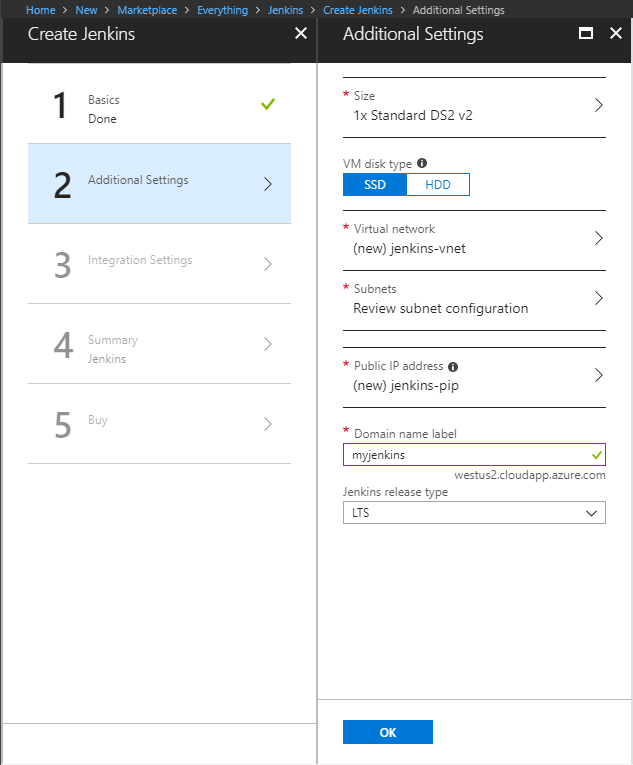
On the additional settings form, complete the following items:
For Integration Settings, select No to use Jenkins host to build the jobs.

If you want to use ACI or VM build agent, you can refer https://docs.microsoft.com/en-us/azure/container-instances/container-instances-jenkins & https://wiki.jenkins.io/display/JENKINS/Azure+VM+Agents+plugin
Once done with the integration settings, click OK, and then OK again on the validation summary. Click Create on the Terms of use summary. The Jenkins server takes a few minutes to deploy.
In the Azure portal, browse to the Jenkins Resource Group, select the Jenkins virtual machine, and take note of the DNS name.

Browser to the DNS name of the Jenkins VM and copy the returned SSH string.
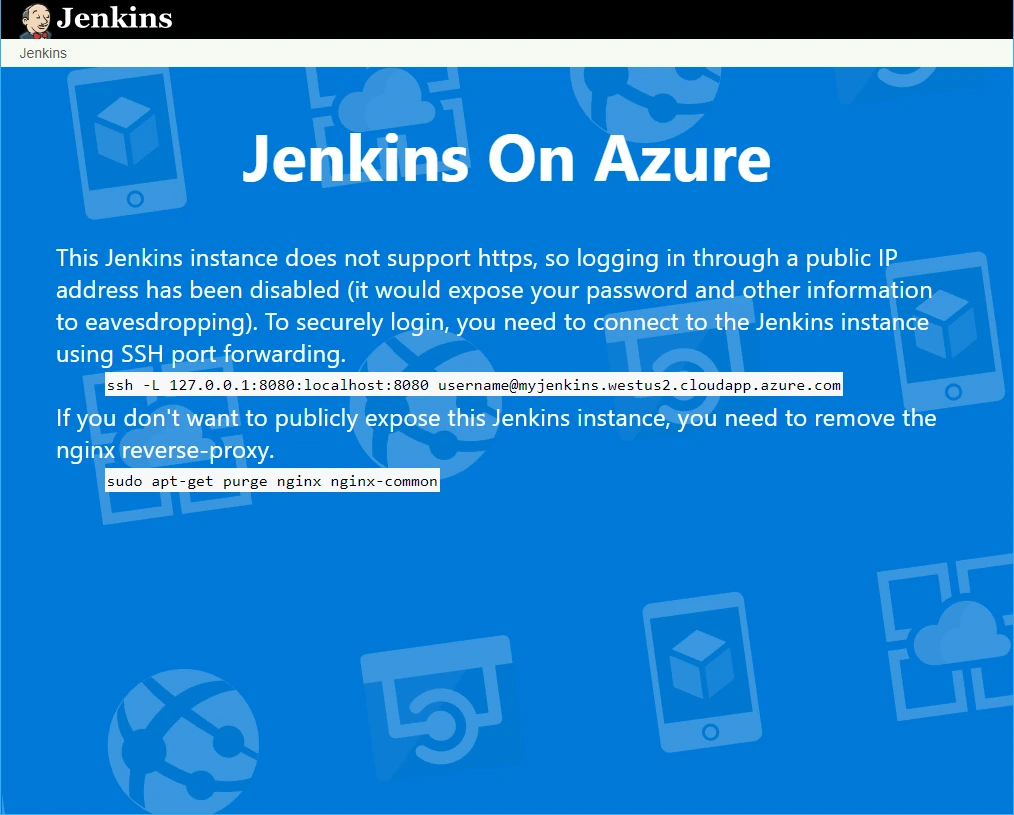
Open up a terminal session on your development system, and paste in the SSH string from the last step. Update ‘username’ to the username specified when deploying the Jenkins server.
Once connected, run the following command to retrieve the initial admin password.
sudo cat /var/lib/jenkins/secrets/initialAdminPassword
az aks get-credentials --resource-group ${resource_group} --name ${aks_name} --admin
(You can skip this step if you have already done it in first-time deployment)
kubectl create secret docker-registry regsecret --docker-server=${acr_server} --docker-username=${acr_username} --docker-password=${acr_password} --docker-email=${your_email}
(You can skip this step if you have already done it in first-time deployment)
kubectl create secret generic aspnetcoredemo-secrets --from-literal=AppInsightsKey=${ai_key}
sudo mkdir /var/lib/jenkins/.kube
sudo cp .kube/config /var/lib/jenkins/.kube/
sudo chmod 777 /var/lib/jenkins/.kube/config
Leave the SSH session and tunnel running, and navigate to http://localhost:8080 in a browser. Paste the initial admin password into the field as seen in the following image. Select Continue when done.

Select Install suggested plugins to install all recommended Jenkins plugins.

Create a new admin user account. This account is used for logging into and working with your Jenkins instance.
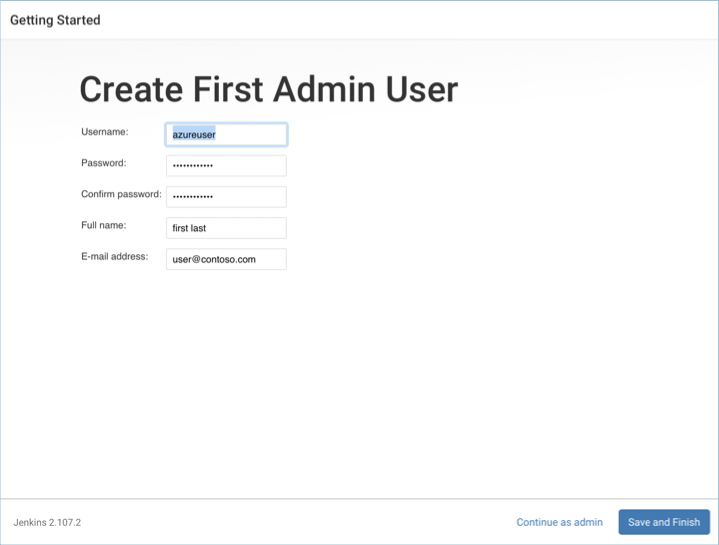
Select Save and Finish when done, and then Start using Jenkins to complete the configuration.
Jenkins is now configured and ready to build and deploy code. For this example, a simple asp.net core application is used to demonstrate a Jenkins build. It can be found at https://github.com/mjrousos/AspNetCore-Sample.
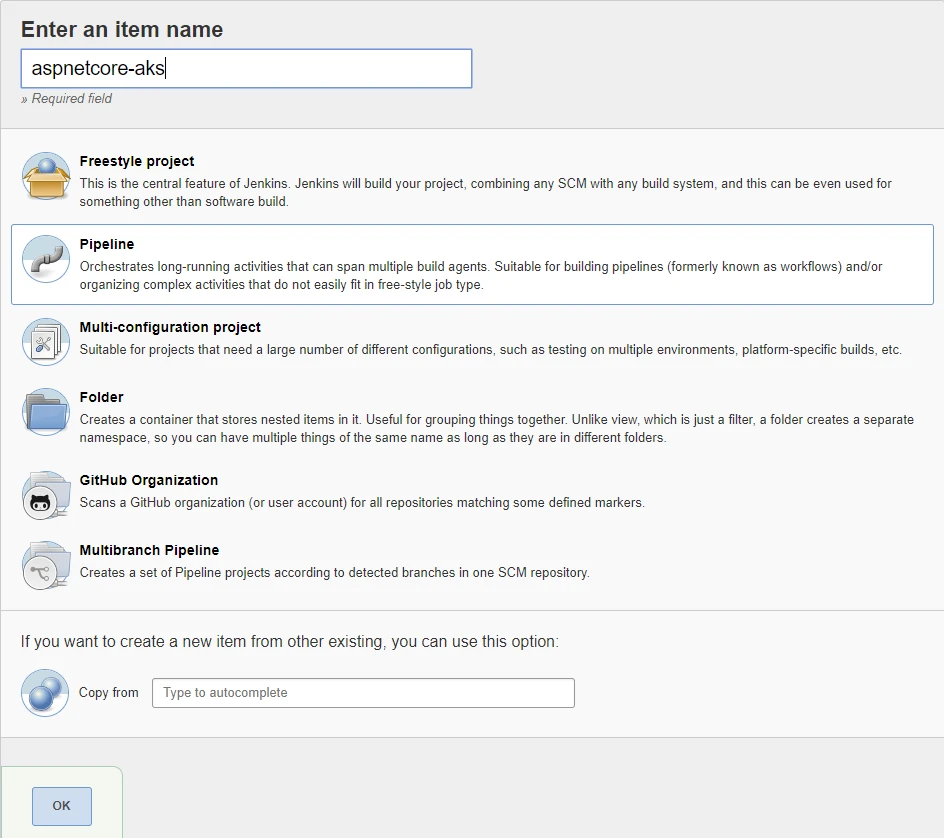
Now create a Jenkins build job. Select New Item, give the build project a name such as aspnetcore-webapp, select Pipeline, and click OK.
Define parameters “git_repo”, “acr_username”, “acr_password”, “registry_url”.

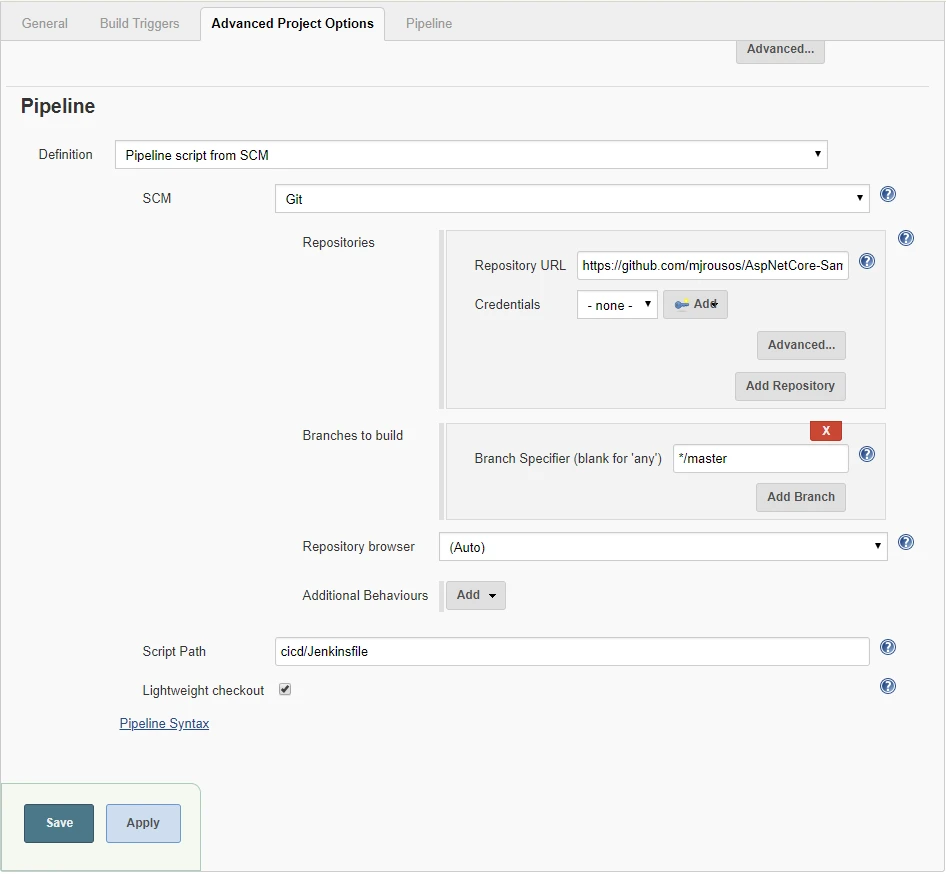
Under Pipeline, set Definition to Pipeline script from SCM, Repository URL to https://github.com/mjrousos/AspNetCore-Sample.git and Script Path to cicd/Jenkinsfile.
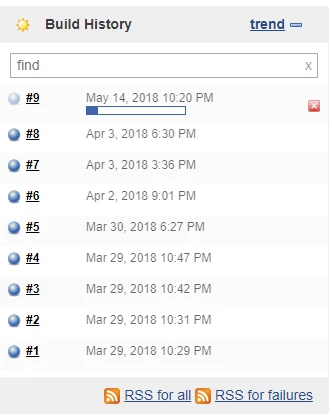
To test the build job, manually start a build.
Select Build Now to start a build job. It takes a few seconds for the job to start, when running, you should see status similar to the following images.

Questions or feedback? Let us know in the comments below.
The Cloud Native Computing Foundation’s (CNCF) Hyperlight project delivers faster, more secure, and smaller workload execution to the cloud-native ecosystem.

Wassette empowers AI agents to securely fetch and run Wasm tools, enabling dynamic, permission-controlled capabilities with zero dependencies.

You can now interactively debug Hyperlight guest micro-VMs. Attach the GNU Debugger at runtime to step through the code.

The Cloud Native team at Azure is working to make AI on Kubernetes more cost-effective and approachable for a broader range of users.