

Hyperlight Nanvix: POSIX support for Hyperlight Micro-VMs
The Cloud Native Computing Foundation’s (CNCF) Hyperlight project delivers faster, more secure, and smaller workload execution to the cloud-native ecosystem.

The Azure Core Upstream team is happy to introduce Wassette: a security-oriented runtime that runs WebAssembly Components via Model Context Protocol (MCP). Wassette allows agents to autonomously fetch WebAssembly (Wasm) Components from Open Container Initiative (OCI) registries and execute them as needed. It’s built on the Wasmtime runtime, offering secure sandboxing on par with modern browser engines. To enhance security, Wassette includes a fine-grained, deny-by-default permission system, allowing interactive control over access to system resources.
Wassette acts as a bridge between Wasm Components and the Model Context Protocol. It knows how to interpret a Wasm Component’s typed library interfaces and expose them as MCP tools. Wassette is written in Rust and installable as a standalone binary with zero runtime dependencies. Getting started with Wassette is quick, easy, and works with any AI agent that supports MCP.

In this post we’ll discuss Wassette’s design, show you how to get started with a basic Wasm Component in GitHub Copilot in VS Code, and how to run a more complicated component that uses the permission system. If you have VS Code with GitHub Copilot installed, you can follow along and in just a few minutes you will have run your first Wasm Component-based tool.
At the most basic level, the goal of an AI agent is to successfully complete any computer-based task you hand it, with minimal human intervention. To make this a reality, agents need more than to be able to complete tasks using the tools they already have installed; they must also be able to identify which tools they are missing and learn how to get them. We can think of this as teaching agents how to go on supply runs: recognizing what is needed and figuring out how to get it.
To do this, agents need to be able to autonomously find, vet, and install tools—and this needs to happen securely and transparently, prompting users for consent at key moments. When interacting with cloud-based services, it makes sense if the tools themselves are hosted in the cloud or by that service. But to run third-party tools locally, they must be strongly isolated using a security sandbox, with tight controls on which resources are shared.
Wasm Components are perfect for this. Components provide workload isolation on par with modern browser engines, which is made possible by a deny-by-default capability system. Components can also be cryptographically signed using tools like Notation and Cosign. And we can execute Components in Wasmtime: a WebAssembly runtime which prioritizes security and correctness, and is conveniently available as a Rust library.
Let’s set up Wassette on your machine. To follow along, make sure you have VS Code with GitHub Copilot installed. Go ahead and do that first if you haven’t already. Next, let’s fetch the latest Wassette release and install it locally by running the following one-liner:
$ curl -fsSL https://raw.githubusercontent.com/microsoft/wassette/main/install.sh | bash
If the install path isn’t already included in your system’s path, you may be prompted to add it to your shell profile and reload your shell. To confirm that Wassette has been installed correctly, run the Wassette command in your terminal.
We’re now ready to teach GitHub Copilot in VS Code how to use Wassette. We can do this from the command line using the code command:
$ code --add-mcp '{"name":"Wassette","command":"wassette","args":["serve","--stdio"]}'
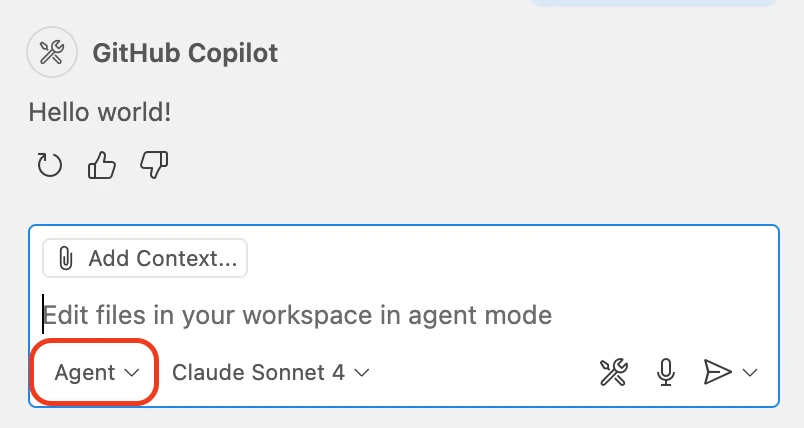
And with that, Copilot is now ready to use Wassette! Now that we are set up, let’s go ahead and open a VS Code instance and navigate to the Copilot panel. In Copilot, we can enter Agent Mode by pressing Command+Shift+I or Ctrl+Shift+I, or by toggling it from the bottom left of the prompt window:
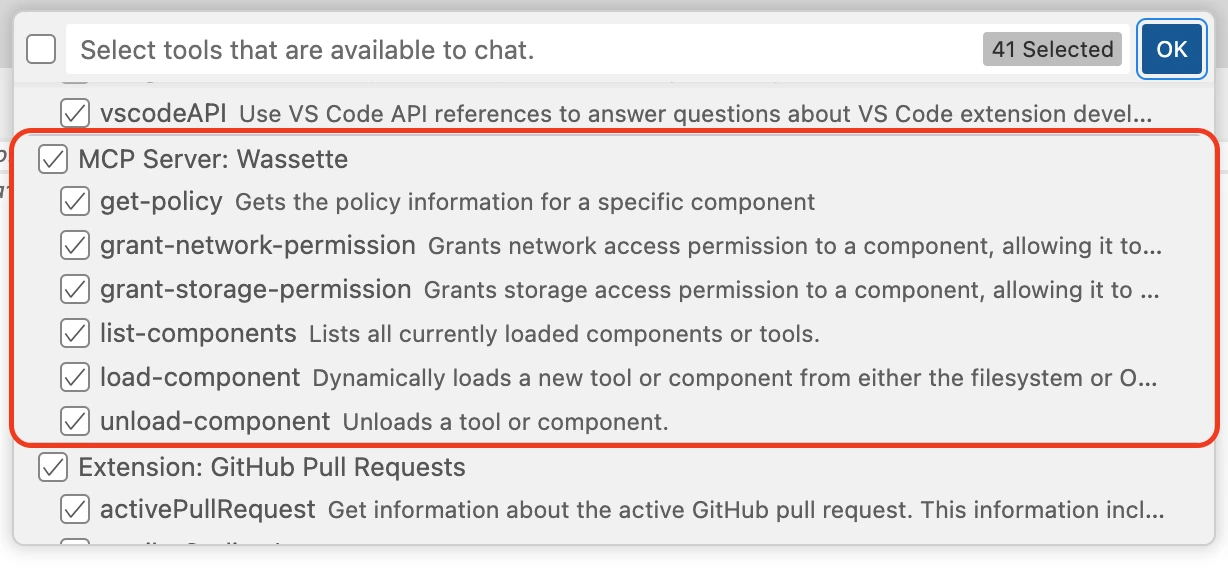
You can confirm that Wassette has been loaded into VS Code by clicking the tool icon in the bottom-right corner of the chat window. If everything has gone well, Wassette will show up in the list of tools.
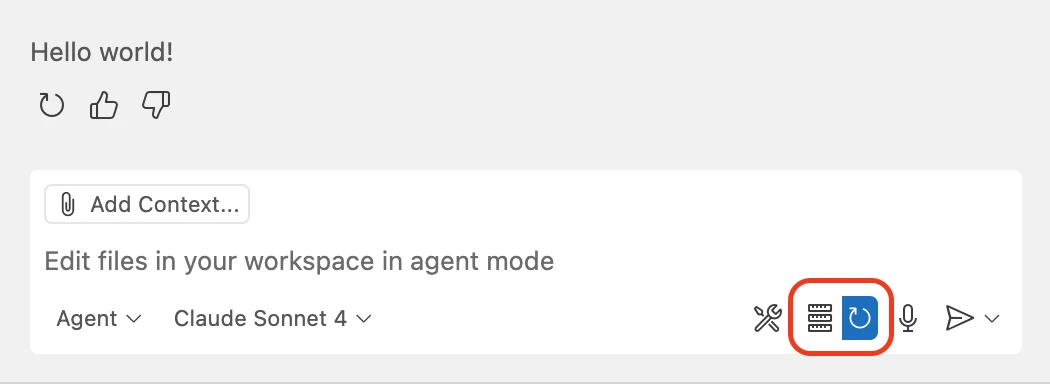
Tip: If it doesn’t show up in your tools list after installation, try reloading GitHub Copilot’s tools by clicking the reload button in the bottom right corner.
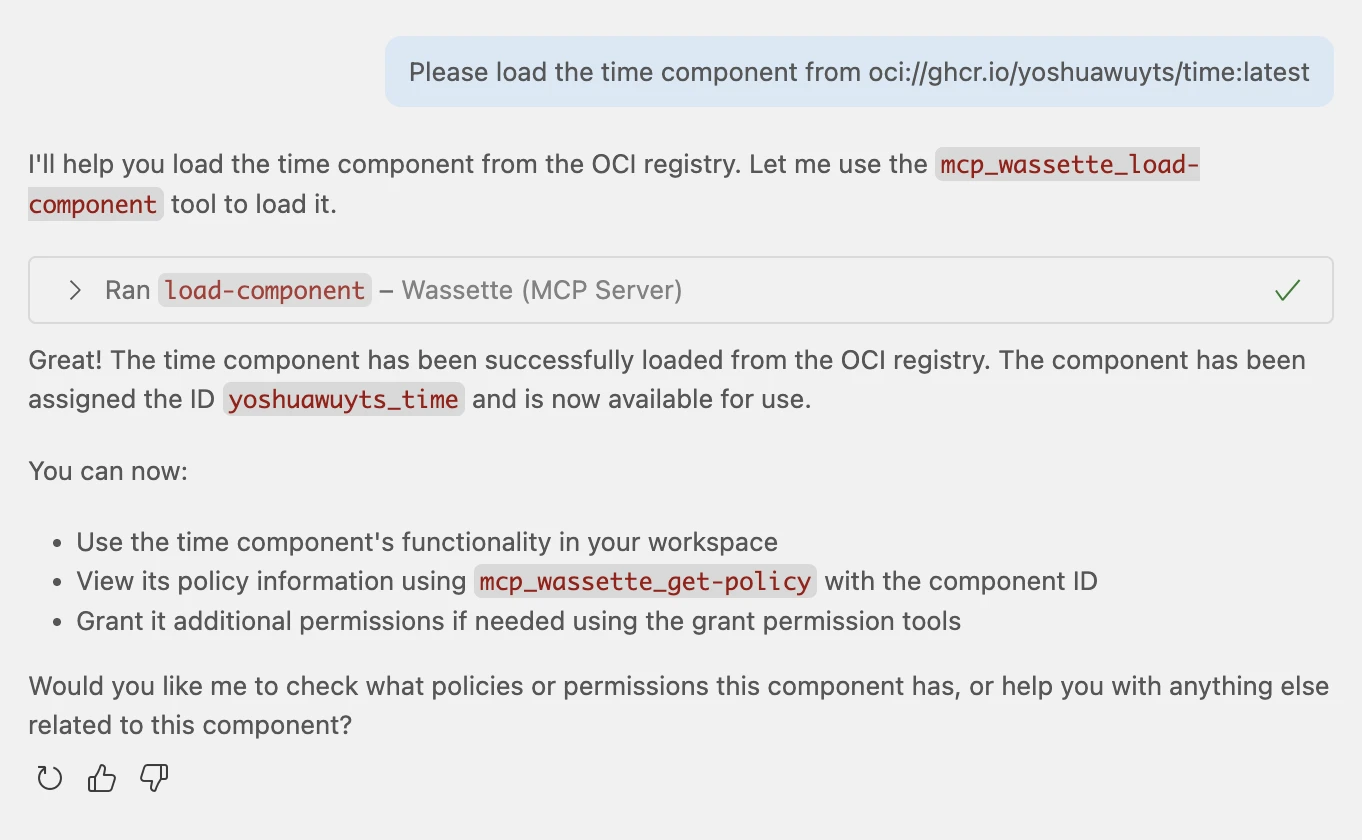
With Wassette set up, we’re ready to load our first tool. By default, GitHub Copilot can only tell the current date, but not the current time. Let’s teach Copilot how to do that by loading a time component from GitHub’s package registry:
Please load the time component from oci://ghcr.io/yoshuawuyts/time:latest
Before Copilot installs anything using Wassette, it will first ask us to confirm it’s going to load the right component:
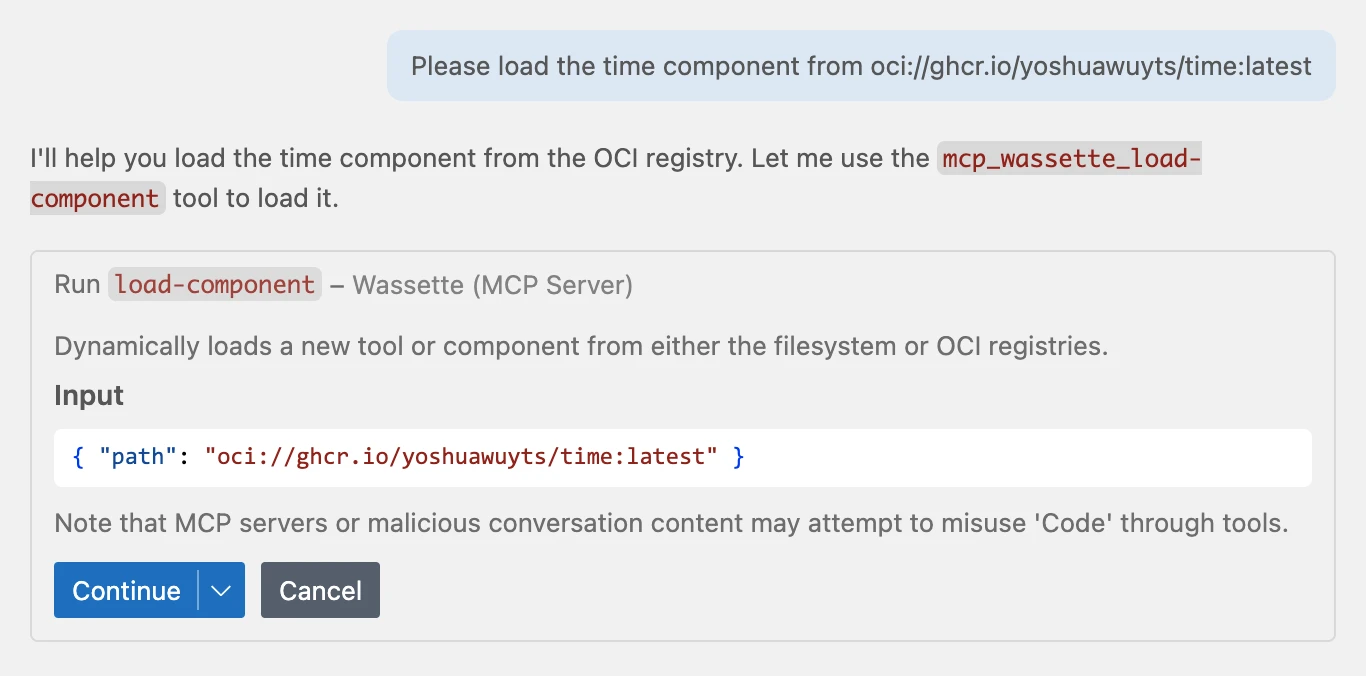
If the path looks good, we can press “continue” and the component should be installed in just a few seconds.
Now that we’ve installed our component, we’re ready to run it. Let’s ask Copilot what the current time is:
"What is the current time?"
This will prompt GitHub Copilot to call Wassette, which has the time server installed:
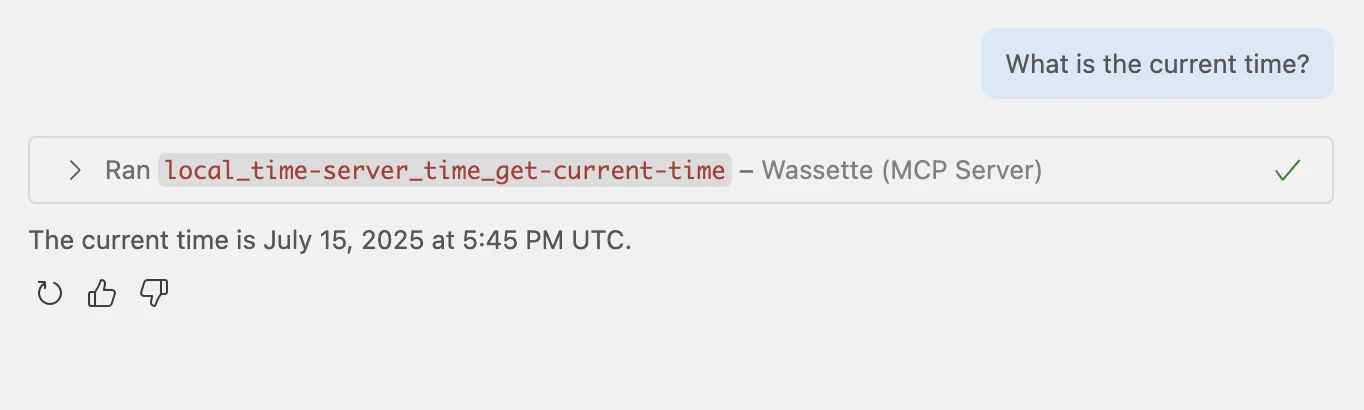
And just like that, we’ve added a new capability to Copilot using a WebAssembly Component.
To protect users from faulty or potentially malicious tools, Wassette relies on the Wasmtime security sandbox. This sandbox applies the principle of least privilege: Components loaded in Wasmtime can’t access system resources without explicit access permissions. This makes sure that, for example, the handy grammar plugin we installed doesn’t attempt to exfiltrate our server’s SSH keys behind our backs.
To get a sense of how this works, let’s load a Wasm Component that will make network requests for us on our behalf. By default, GitHub Copilot ships with its own fetch tool. To guarantee it will use the one we’re providing it, let’s start by disabling the built-in fetch and browser tools from the drop-down:
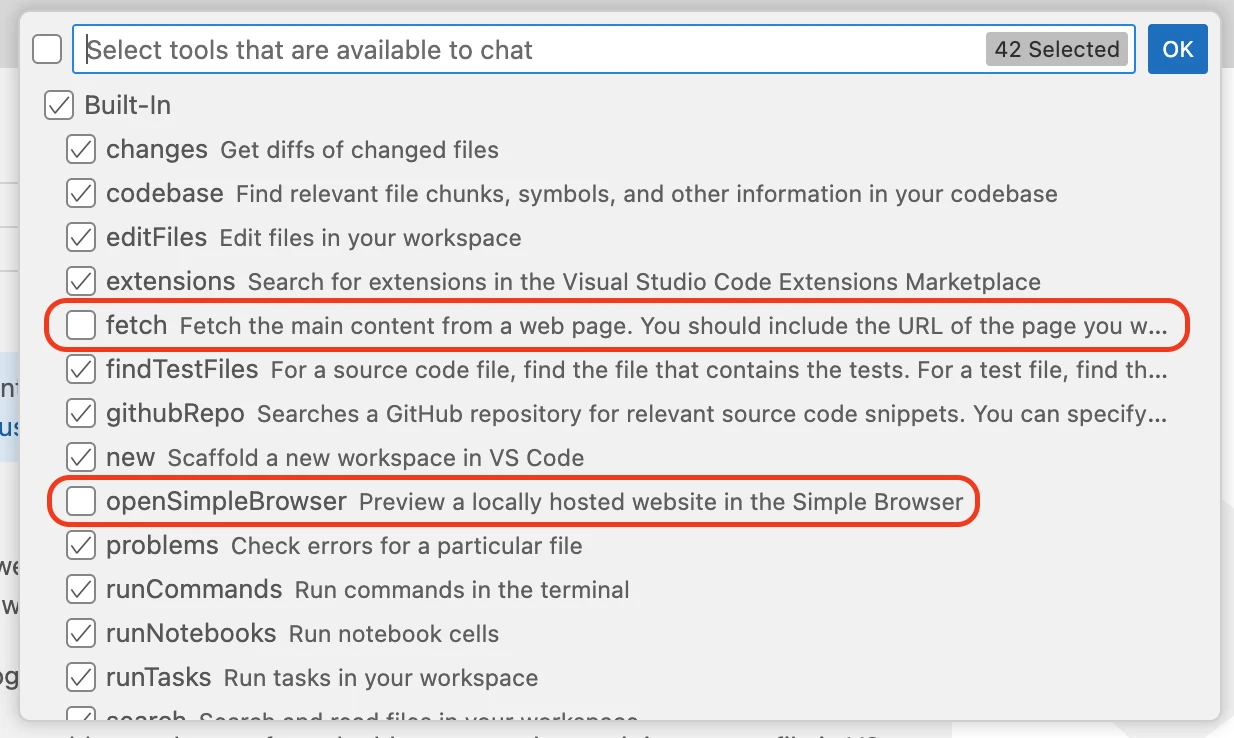
Once we’ve pressed “OK”, we’re ready to continue. With the built-in network tools disabled, let’s re-teach GitHub Copilot how to make HTTP requests by loading our own tool, using the following prompt:
Please load the fetch component from oci://ghcr.io/yoshuawuyts/fetch:latest
Just like with the time server, Copilot will ask us to confirm it’s found the right tool before continuing:

Once we’ve pressed “Continue” and the component is installed, we’re ready to make our first HTTP request. Before we do this, we’d like to learn more about storing components in OCI registries—let’s ask GitHub Copilot to give us a summary of a blog post on this topic:
Please provide a concise summary of https://opensource.microsoft.com/blog/2024/09/25/distributing-webassembly-components-using-oci-registries/
Components in Wassette are not allowed to access arbitrary domains for security reasons. The first thing GitHub Copilot will do is ask us to grant the component permission to make requests to “opensource.microsoft.com”, since that’s the domain of the post.
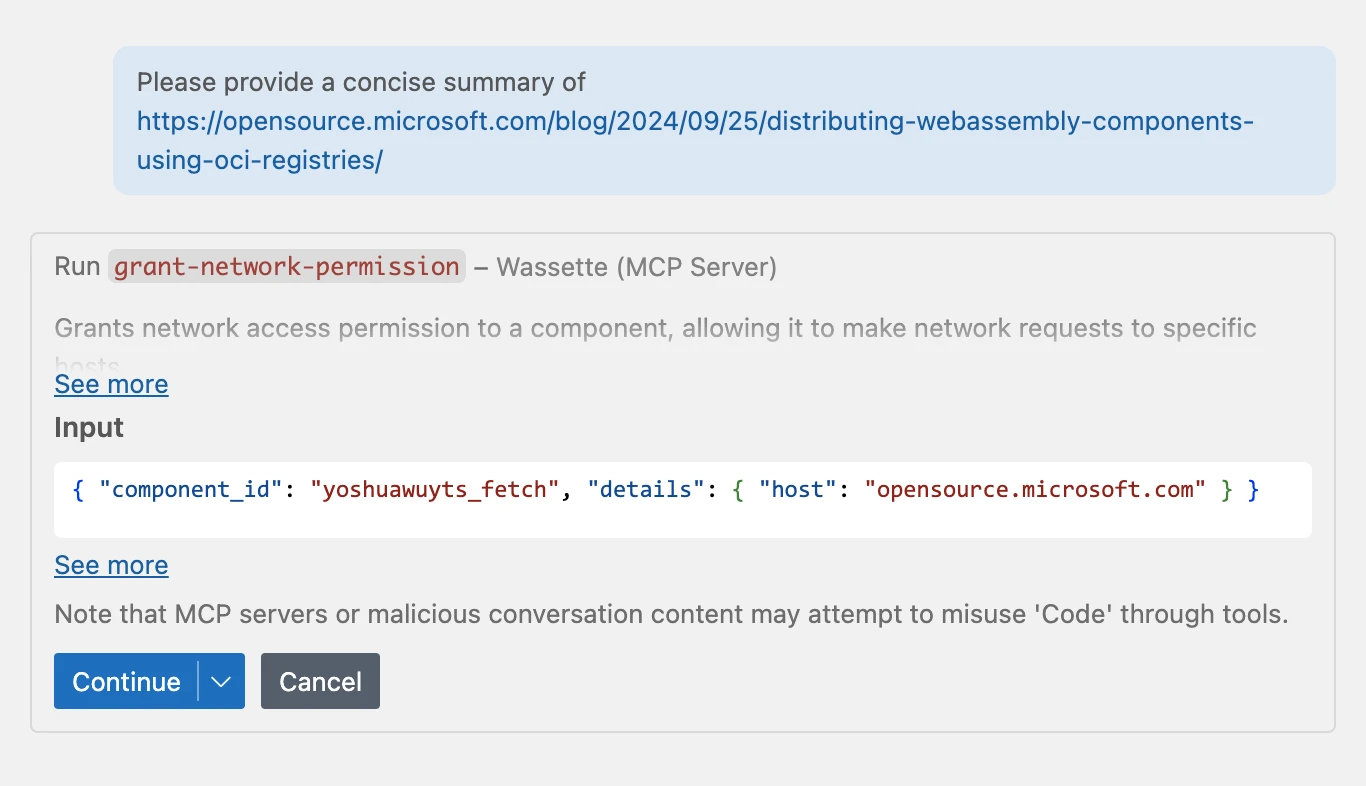
Once we’ve granted our fetch component the right permissions, GitHub Copilot is ready to use it to make the request.
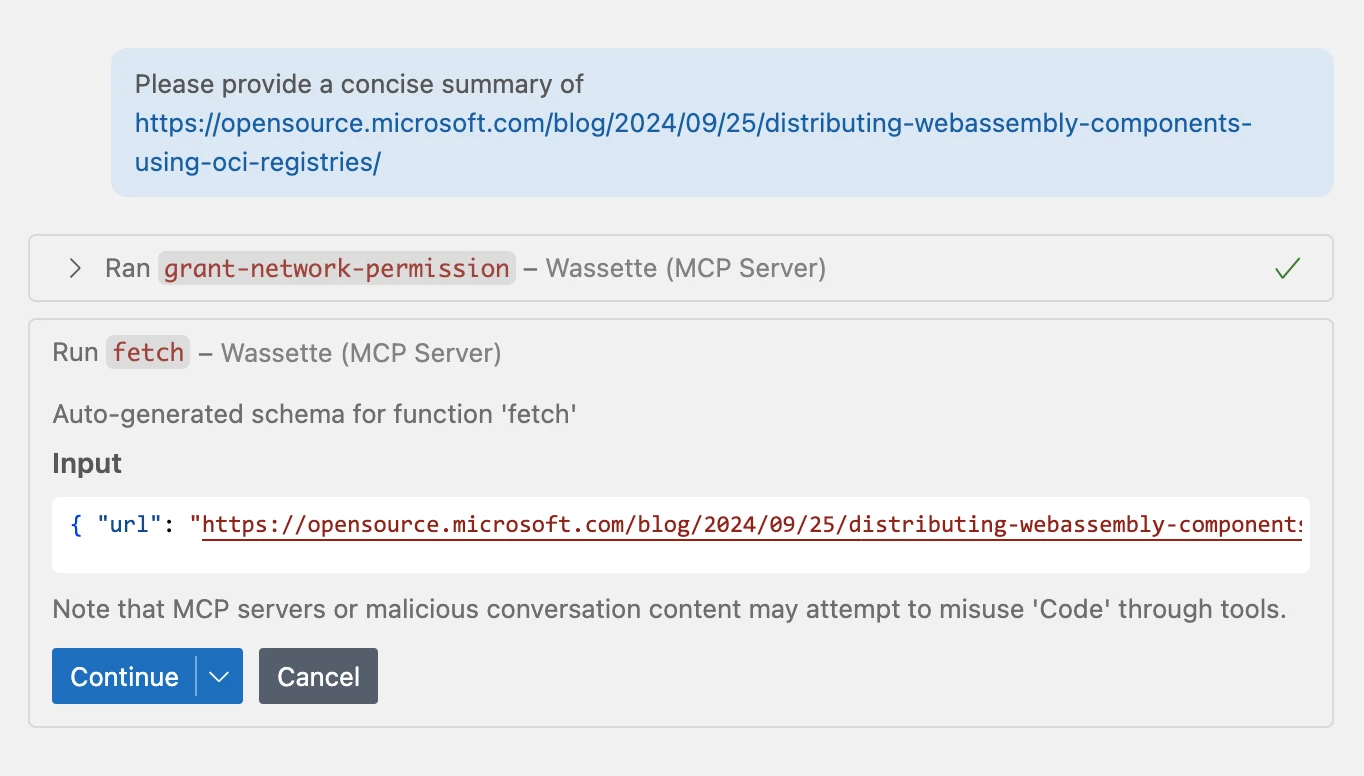
Once we press “Continue”, the fetch component will get the content, and Copilot will summarize the article for us:

Congratulations! You’ve just loaded your second Wasm Component and used capability-based security to manage its network permissions. With Wassette, even if a faulty or malicious third-party tool is accidentally loaded and gains access to sensitive data, it would still be difficult for a potential attacker to extract that data.
If you try to recreate this exact flow yourself, be aware that different models may produce different outcomes. Sometimes agents will need a little nudge or hint to fix the permission errors. We’re working to make this more consistent in Wassette by providing better error messages. But until then, be aware you may need to sprinkle in the occasional: “please fix the permission errors.”
There is more to Wassette than we can reasonably cover in a single post. For example: Wassette does not just run locally—it can also be used to host Wasm Component-based MCP tools over the network. We’re also working on tools that make porting existing applications to Wasm Components easy, removing the biggest barrier to adoption. We’ll be sharing more on both soon.
We believe that if an agent is missing the tools it needs to complete a task, it should be able to autonomously find those tools and load them. We’ve shown that while Wassette can get us really close to making that a reality, it’s not quite all the way there yet. The last part we’re missing to realize this vision is to teach Wassette how to find Wasm Components in OCI registries.
You can learn more about Wassette on GitHub. We have detailed installation instructions for various conversational agents, including GitHub Copilot in VS Code, Claude Code, Cursor, and Gemini CLI. To start building your own components, check out our examples for Python, JavaScript, Rust, and Go. And if you’d like to talk to us, join the Wassette channel on the Microsoft Open Source Discord. We look forward to seeing what you build with Wassette.
The Cloud Native Computing Foundation’s (CNCF) Hyperlight project delivers faster, more secure, and smaller workload execution to the cloud-native ecosystem.

You can now interactively debug Hyperlight guest micro-VMs. Attach the GNU Debugger at runtime to step through the code.

The Cloud Native team at Azure is working to make AI on Kubernetes more cost-effective and approachable for a broader range of users.

We're announcing the release of Hyperlight Wasm: a Hyperlight virtual machine (VM) “micro-guest.